
Dr Fiona Whittington-Walsh, Lead Advisor on Disability, Accessibility and Inclusion
This guide was created to assist instructors in preparing resources for students who read Braille. I recognize that my knowledge about Braille printing is, as Susan Burch (2023) writes regarding ‘accessibility’ in general, “an unfinished process”. We can never be 100% accessible because no two people require the same supports.
My critical disability pedagogy has its foundation in IACP. It informs everything I do regarding teaching and learning. Critical Disability Pedagogy maintains that all students should have equal access to all course materials regardless of ability or disability. That is their right as students, and it is my job as an instructor and the wider institution’s job to make sure that right is actualized.
As an instructor practising Critical Disability Pedagogy, I maintain that the resources I share with students (whether in the class with presentations via power-point for example or the course syllabus) need to be accessible to all students. It is my responsibility to make sure students have equal access to these course resources. I do not believe that students should be responsible for creating their own copies to meet their support needs. As an instructor, I need to provide these resources.
My ‘expertise’ in creating this guide has been shaped and enhanced by two students in my class who read with Braille. Through a trial-and-error approach, I can now share what I have learned from working closely with my students. One student took the lead on making sure I understood the Braille process and what method was best when creating course materials. I firmly believe that it is not a student’s job to inform the instructor about how to teach them, therefore, I made sure the student received an honorarium for this work.
I am grateful to Kelsey Chaban, Interim Indigenous EDIA Librarian, and Joanne Skabar, Library Assistant, for supporting my knowledge and this unfolding guide. They made sure my documents were printed each week until I was able to be trained with the embosser. They also made sure last-minute printing was available to me and ultimately my students. Their support has been and continues to be invaluable.
A note about language: Language preference varies. I use “visual disabilities” and avoid using “loss” or “impairment”. Avoid using language that emphasizes otherness and/or loss.
What is Braille?
People with visual disabilities vary in sight ability. Some have no vision, others can see large shapes, read standard print if enlarged, and some are just ‘blind’ to certain colours. Depending on their differences, they use a “variety of accommodations, equipment, and strategies” (Sprabary, 2021). Not all students with visual disabilities are the same and not all read with braille.
Braille is a tactile system of communication that provides a non-visual alternative to visual print communication (Martiniello, & Wittich, 2022, 2516). Braille uses individual six-dot configurations also referred to as “cells”. When combined, these cells create words so that the reader reads not by sight but by touch (IrisVision).
Before KPU had the Braille printer, students who read with Braille would have had only two options to access course material: (1) course materials would have to be sent to an outside organization for Braille printing or (2) students would have to use a different mode of reading.
(1) Relying on outside services requires time. Students who need information put into alternative formats must wait for the materials to be produced for them. The turnaround time can be several weeks. This means that they could fall behind in their studies.
From the instructor’s perspective, having to have materials ready to be sent to an external site weeks in advance is not always feasible. I am usually still tweaking my syllabus right up until the first day of class! I am also working on my lectures including power-point presentations in response to the previous week also making it impossible to have these ready weeks in advance.
The Centre for Accessible Post-Secondary Education Resources (CAPER-BC) is an external organization that provides accessible versions of course materials. However, currently they do not provide resources in braille. Currently on their website they state they will “locate and borrow braille when it is available and… will produce e-text, which allows for use on various devices”. Having to locate external braille equipment and/or services creates additional wait time. Further, producing resources as ‘e-text’ requires reading using a different mode other than braille.
(2) Students who read in braille were taught to read using the braille system. Having to use a different mode for reading and learning, such as screen readers, forces the student to rely on auditory literacy, rather than the tactile literacy of braille. Think about that for a minute. Those of us who were taught to read using sight take it for granted that we will have full access to materials in our first, and possibly only, mode of reading.
KPU’s Braille printer is located in a common area of the library on Surrey campus. It is available to everyone including students and the wider community. This means instructors have the same access as we do with other on campus printers. This is significant for advancing accessibility because the instructor can print off resources for their students without any wait time or involving other departments or external services. This eliminates a major barrier that would exist if instructors had to send their resources needing printing to an internal department for printing. This is key to Critical Disability Pedagogy.
Preparing Power-Point or Digital Presentations for Braille Printing
All students should have access to all the lecture material at the same time. Whatever you are sharing in the class, it needs to be accessible to every student. Power-Point (or other presentation mediums) are visual documents that accompany what a speaker is saying. If someone is not able to see the presentation, that is a major barrier.
To print a presentation document using the braille embosser, you need to make a word version of your power-point. Here is the breakdown of what I do to (1) create an accessible presentation and (2) create a word version of my lecture power-point (or any class resource) to print using the braille printer.
Create your power-point presentation.
- Remember to have slide numbers on each slide.
- Don’t have too much text on each slide. Spread out the information over numerous slides. I do use text animations and add fly ins for the actual presentation. This helps your audience focus on what you are saying, and the key ideas are on the slide.
Note: remove the animations (fly ins etc.) when posting the presentation on moodle or other digital platforms. Screen readers have difficulty with text animations. - I use Aptos Header font 44 for headings and Aptos Body size 28 for the information on each slide. This size allows many students in the class to be able to see the information on each slide. Extra empty space supports everyone’s ability to be able to see and process the information.
Example Accessible Power-Point
Note: Keep your power-point slides simple with little text on each slide and little effects. I add simple, non-evasive design elements that do not overpower or detract from the important information. I also do not use images only for aesthetic purposes. All images are there to reinforce an idea and they are all described so that the audience understands why they are there.
Note: Make sure you describe all images. Image descriptions benefit everyone. They help your audience pay attention to the key aspects of the image, what they are looking at and why.


Preparing for Braille Printing:
- After creating your power-point presentation, copy the text from each slide onto a word document. Braille printers do not distinguish bold text, capitals, underlines, fonts etc. I generally keep all text formatting simple and the same.
- Each new slide is clearly numbered, and the slide heading (title) is identified as well as any image descriptions. I use number format in word that will number each text section (each slide) after I hit enter/return.
- Separate each new idea or thought on each slide with a comma.
- When there is a quote on a power-point slide, clearly identify the quote by starting it with ‘quote’ then the text of the quote followed by ‘end quote’, and then to continue the text on the slide write Text and continue. End the slide with a period.
Note: the bold and underline is just to emphasize here in the guide, not to be used for the braille printing.

Example:
33. Heading Media and Ideology, underlying images of society, quote “System of meaning that helps define and explain the world and that makes value judgments about that world end” end quote, source Croteau and Hoynes 2014, page 216.
- If there is an image, then you need to describe it and clearly identify the description by stating “Image Description” and then describe the image. After describing the image state “end of description”. If there is additional text on the slide then you state “Text” and then continue.

Example:
4. Heading Capitalist Ideology, Image description of man sitting on cold wet snowy slushy busy city street, Tim Hortons cup is sitting beside him end of description, text Capitalist economic system is fair, you work hard, you prosper, success is down to the individual.
- End each slide with a period.
- Start the next slide using number format.
- Leave extra space in between each slide number and at the bottom and top of each page. Sometimes, the embosser will cut off ‘text’ if it is at the bottom or top of a page.
- Make sure to number each page of the word document. Be consistent with the position of your page numbers. I have a braille letter and number board that helps me learn and identify the page numbers.
Here is what the above power-point example looks like as a word document that is ready to be printed using the embosser:

Follow the same process for the rest of the presentation.
You are now ready to email the word version of your power point to yourself and go to the library for printing. Please contact the library about receiving training. It is not hard, but you do need to have training in order to use the printer.
This is what the power point word document looks like on the embosser. This is when you can add extra space at the end of the page and the top etc if you need to.

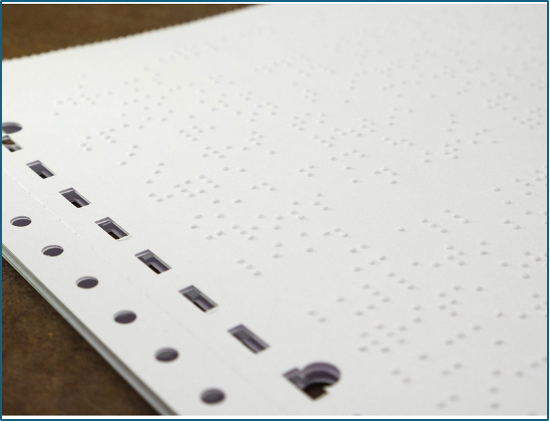
The Printed Document
I check my braille printing and make sure that it is ready to give to students. The first time I received the printing of my course resources it was very humbling handing a document to a student not knowing if it was upside down, in the right order, etc… Now, with much humility and learning, I am confident that what I hand to students is correct and in order.
- If the rectangular holes are on the left side of the page, it means the page is right side up and ready for reading.
Recommendations
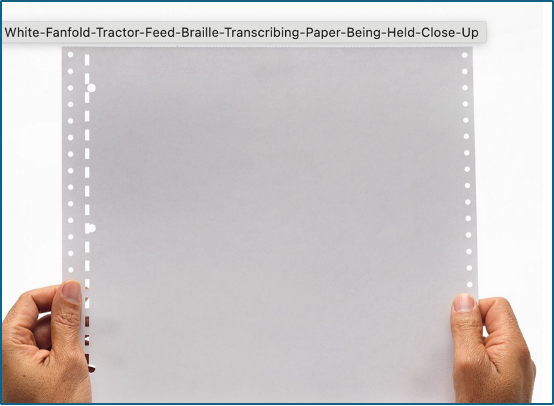
- Remove the excess perforated paper with round holes from both sides of the paper.
- Separate the pages.
- Check to make sure the pages are in the correct order.
Note: There is an accessible computer desktop at the braille printing station in the library where you print your braille documents from. There is also an accessible, braille keyboard. You can check the page numbers with the numbers on the keyboard (it includes both text and braille).
- Staple the pages together (top left side) and write the document title on the top.
Now you can be confident the document is ready to give to students. I also print a desk copy to keep in my office in case students come to my office.
Presenting/Lecturing
When presenting and/or lecturing, make sure you clearly say what slide you are on and read the heading:
Example:
“Slide 4 Heading Capitalist Ideology…”
- Read the image description when the image is revealed.
Example of what you would say in class:
“Slide 4 Heading Capitalist Ideology, Image description man sitting on cold wet snowy busy city street, Tim Hortons cup is sitting beside him” …
I keep a copy of the word power point that I printed with the embosser with me and my lecture notes in case I need to check that the slide information is the same. I also make sure that the image descriptions I say in lecture are the same as they are on the braille power-point copy. Remember, students are reading along with what you are saying so you want to make sure it is accurate or there could be confusion.
I try to remember to point out when I am just talking and there isn’t any additional slide information if I am going ‘off slide” – which is often!
Speak to your students who read with braille and ask them how they prefer the braille power-point or other resources to be organized. I don’t use heading sections which are available on the embosser. My current students prefer not to have that setting. Using a heading setting pushes the heading text towards the middle of the page for each heading.
It takes a few lectures for students to understand your way of organizing your lectures and power-points and for you to know what the best method for providing your resources in braille. It’s a learning curve for everyone, including students who are not reading with braille. I bring my braille alphabet board to class so that I can check things and students can also explore reading with braille.
Additional Ways to Support Students with Visual Disabilities
On the first day of class at the beginning of fall 2024 term, I verbally described the classroom we were in. One of my students who has a visual disability, screamed with delight while I described the grey floor, tall ceiling with pipes running along the top, a projector, a wall of windows, one wall in the front where I was standing has whiteboards, an instructor’s computer station, the screen for projection, two empty walls, number of students sitting in various rows at tables with two seats, etc. This was not their first course at KPU, but it was the first time anyone had described the physical space they were in.
For those of us who do not have visual disabilities, we often take for granted the amount of visual information we are exposed to every day. Many students with visual disabilities do not have this “lifetime of visual experiences to draw upon” (ADCET). To be inclusive and accessible we need to pivot towards a verbal style of teaching and communicating. It’s about communicating with the assumption that people are not seeing what we are doing (ADCET).
Here are a few recommendations:
- Before the first day of class, send an introductory email to your students and ask if there are any support needs. Reaching out and inquiring about any support needs sends a message of ‘inclusivity’ and accessibility and helps you prepare to teach all your students.
- Ask who requires print copies of the syllabus etc… and what accessibility is required for those copies. Some students need print copies to support their learning, online digital versions support others.
Note: I am not advocating that you necessarily provide all resources in print form for all students. There is sometimes friction between environmental advocacy and accessibility needs of people with disabilities. However, when it involves equal access and without the printed document the student would not have equal access, we need to choose accessibility.
As instructors, we want to provide the supports our students need to be successful in our courses. This is not about providing unfair advantages; it’s about providing equal access and supporting the learning needs of all students.
- When you find out you have a student with a visual disability, arrange a meeting to find out what their preferred reading mode is. Not all students with visual disabilities read with braille. Some might prefer documents are printed using large font etc.
- Describe yourself at the beginning of each class. This creates a sense of belonging and inclusivity and can facilitate others in the class to do the same.
- Verbalize anything you are writing on the black/whiteboard.
Talk through any calculations as they are made or procedures as they are carried out. - Pause on important points.
- Read any printed information and describe any images, charts or graphs.
- If you have online materials or a class website, are these accessible? Screen readers, for example, can’t translate and read photocopied, scanned documents. Not all PDFs are accessible. Convert PDFs to word documents and share both versions. This gives all students choice as to how they engage in course material.
- Prepare as much information as possible in electronic format – this makes it much easier to provide materials in accessible and multiple formats. If you do have hard copies of handouts, make sure you provide braille and/or copies with large font according to your students support needs.
- Make required book lists and course materials available early so there is sufficient time for them to be reproduced in accessible formats (i.e. audio or Braille) if required. I audio record all my required readings and post them on Moodle with multi-modal text readings i.e. word and pdfs. I argue this falls under Fair Dealings Exemption.
Note: I am committed to ‘zed-cred’, therefore all of my readings are open access materials either through an Open Resource or articles available through the library or online. - Offer to provide an individual orientation to lab equipment or computers to minimize potential anxiety from unfamiliar environments.
Additional Recommendations From University of Massachusetts Dartmouth
- Identify yourself by your name – don’t assume students will recognize you by your voice.
- Speak naturally and clearly.
- Use everyday language. Don’t avoid words like “see” or “look” or talking about everyday activities such as watching TV or videos.
- Try not to end a conversation with a student without saying you are doing so.
- Use accurate and specific language when giving directions. For example, “the door is on your left”, rather than “the door is over there”.
- Address people who have visual disabilities by their names, so they know you are speaking to them.
References
Australian Disability Clearinghouse on Education and Training (ADCET). https://www.adcet.edu.au/inclusive-teaching/specific-disabilities/blind-vision-impaired
Birch, Susan. (2023). Committed: Remembering Native Kinship in and Beyond Institutions. The University of North Carolina Press.
IrisVision. Braille: A Universal Means of Communication for the Visual Impaired & Legally Blind. https://irisvision.com/braille-a-universal-means-of-communication-for-the-visual-impaired-legally-blind/
Martiniello, Natalina & Wittich, Walter (2022). The association between tactile, motor and cognitive capacities and braille reading performance: a scoping review of primary evidence to advance research on braille and aging, Disability and Rehabilitation, 44:11, 2515-2536.
Sprabary, Autumn. (2021). Guide for Visually Impaired College Students Disability Resources at Texas A&M University. https://www.allaboutvision.com/conditions/blindness-low-vision/guide-for-visually-impaired-college-students/
University of Massachusetts Dartmouth. (2024). How to Teach: Blind or Low Vision. https://www.umassd.edu/accessibility/resources/faculty-staff/how-to-teach-and-accommodate/how-to-teach-blind-or-low-vision/
Willings, Carmen (2024). Teaching Visually Impaired. Updated March 25, 2024 https://www.teachingvisuallyimpaired.com/braille-technology.html