
During Recording
In studio
STEP 1
Power on the studio.
There are two remotes you need to press before powering on the studio. One is the switch before you enter the room, press “on” once and you will turn on the camera and the backdrop motivation light.
Second is the remote on the desk, press the “red dot” on top-left to turn on the display, then press “on” couple times to turn on the rest of the lights in the room. Don’t worry about the brightness, we will adjust that at a later step.
Step 2
Select the backdrop.
There are 3 choices to choose from when it comes to backdrops: black, white and green. Depending on the clothes you are wearing, you will want to pick a background colour that contrasts what you are wearing.
If you are wanting to use the green screen, please let us know in booking what you plan to do with the green screen as settings for it would need to be adjusted in advance.
STEP 3
Adjust the light’s brightness.
Now that you have selected a backdrop, you should adjust the lights that are lighting your face. I recommend anything over 50%. Pickup the white remote on the desk and press the “red dot” to bring up the display (if not on already), then press “on” until your face is well-lit. Press “off” to bring down brightness.
Step 4(optional)
Adjust the desk’s height.
The desk in the studio is height-adjustable. There are two presets, (1) is a sitting position and (2) is a standing position. Press the “up” or “down” arrow keys to further adjust the desk to an optimal height.
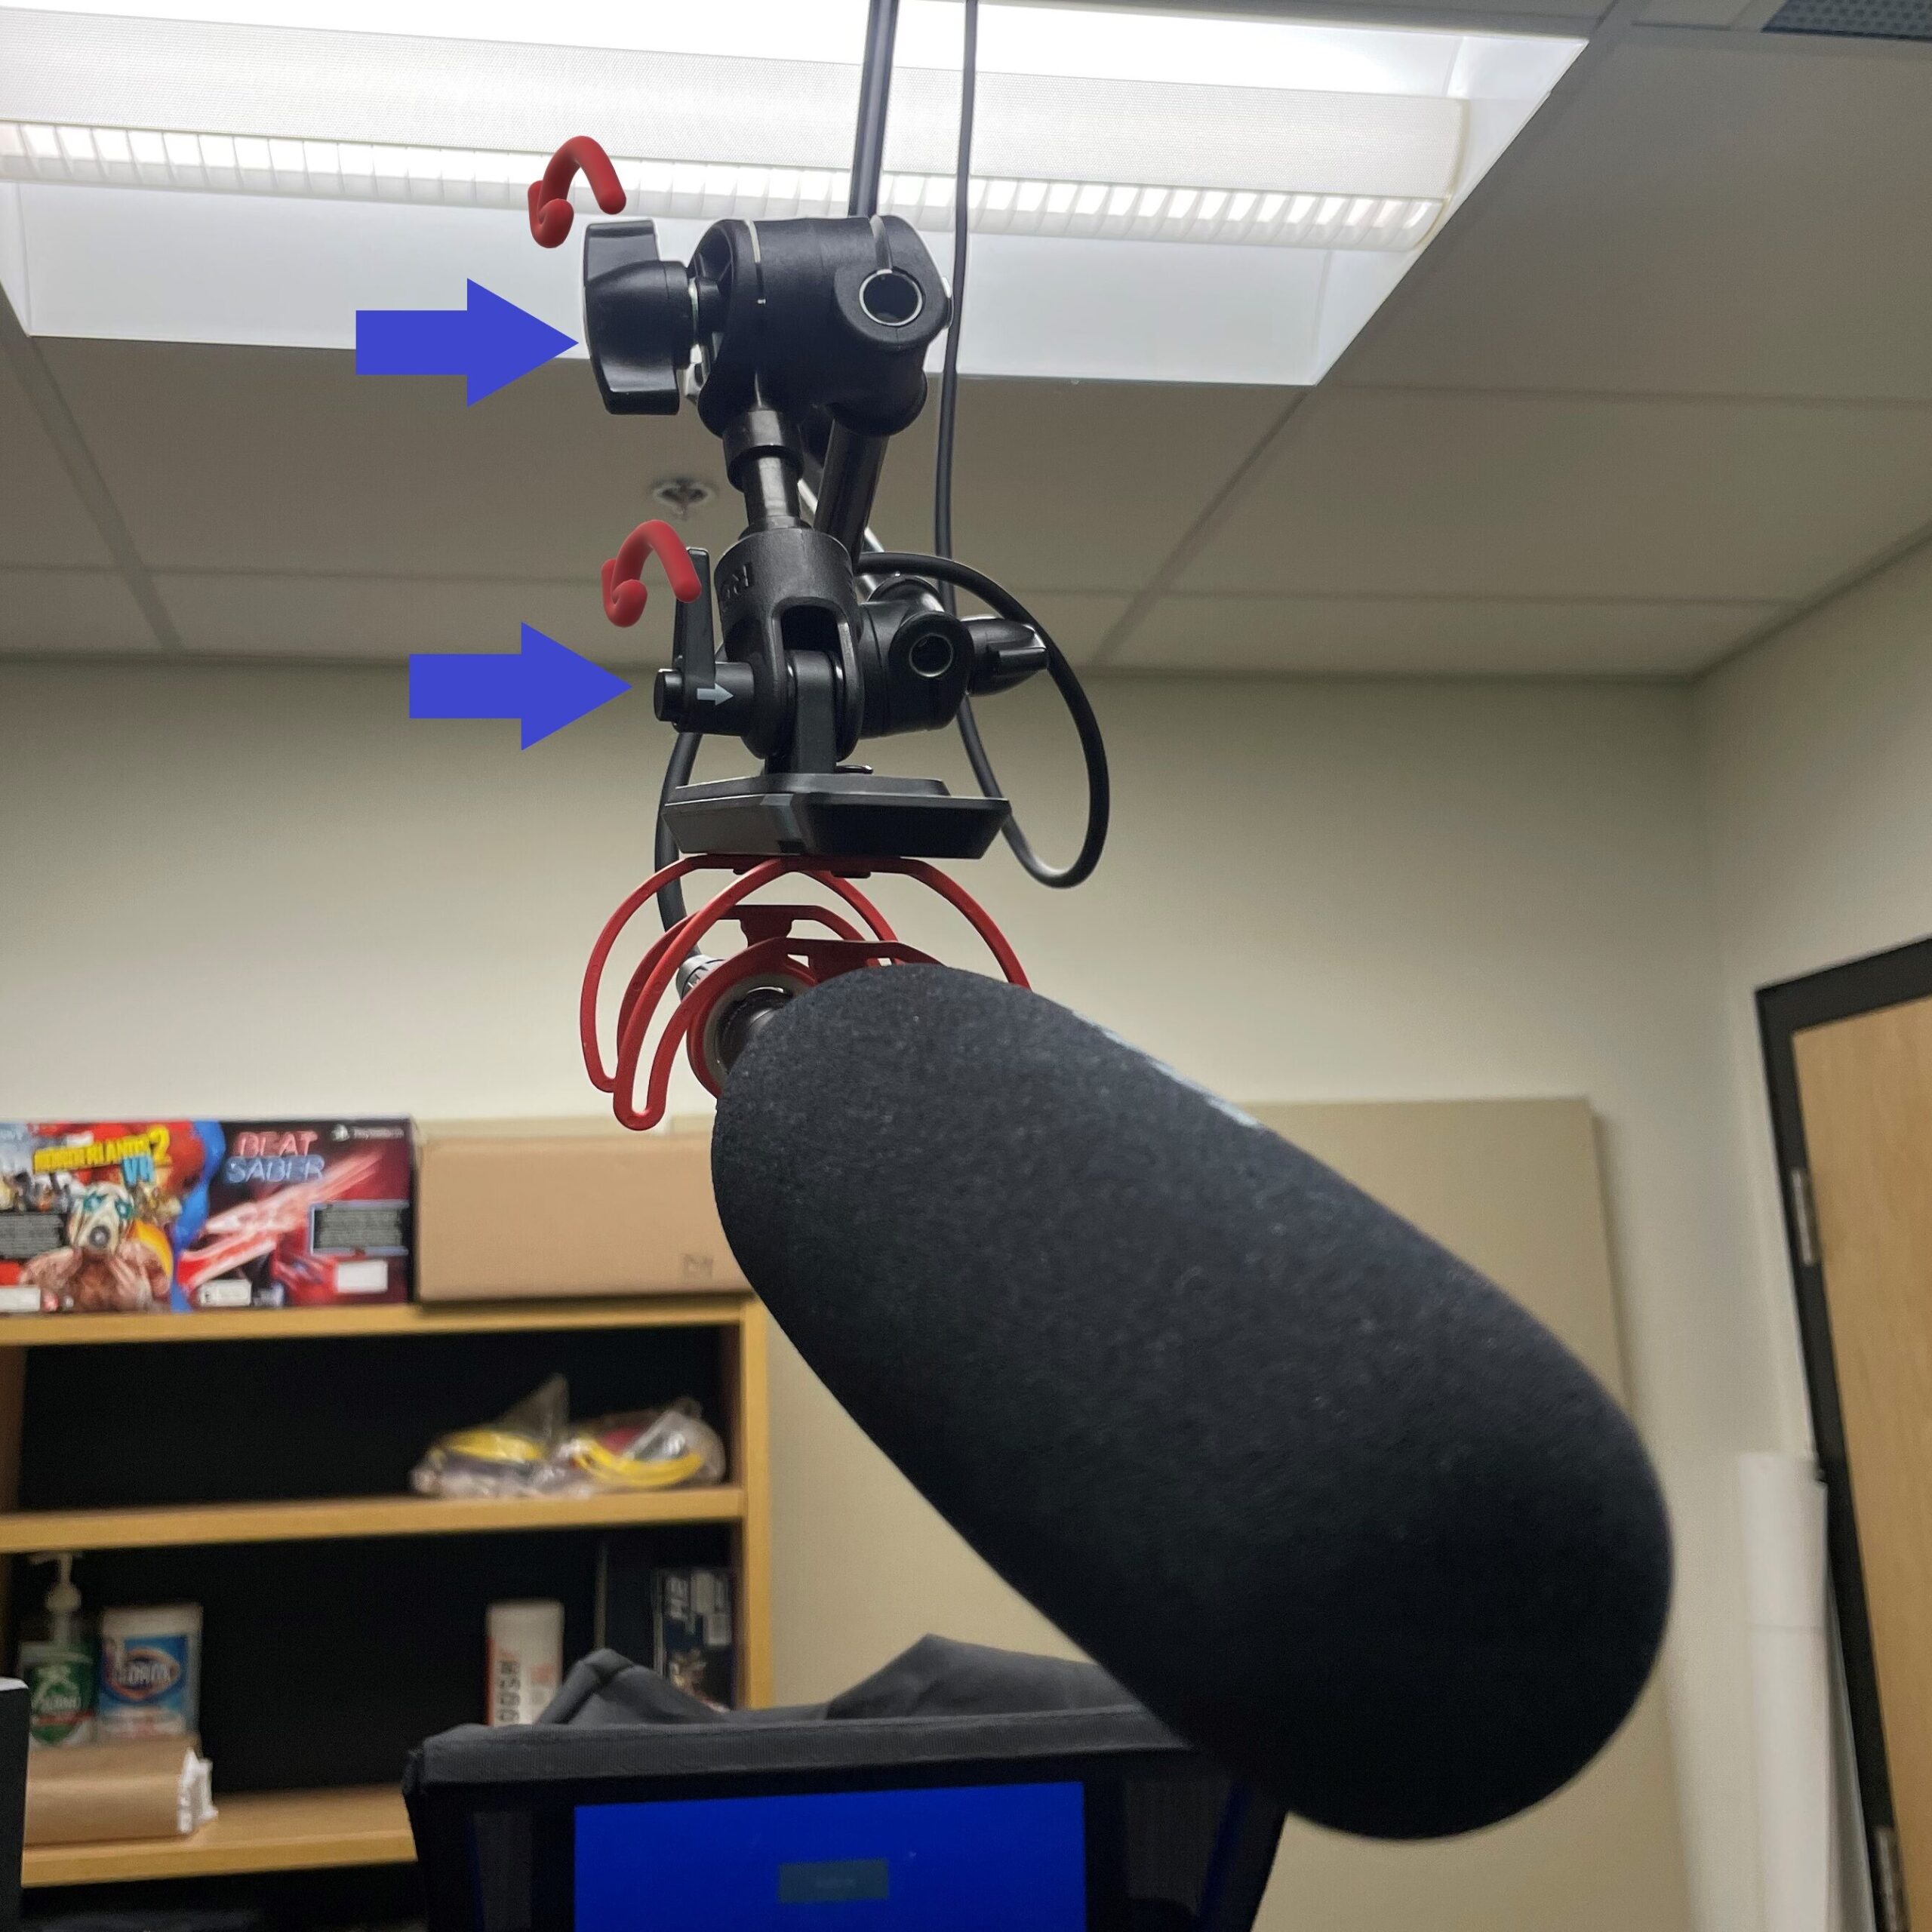
STEP 5 (OPTIONAL)
Adjust the microphone.
By default, the shotgun microphone is set to a standing height. It should be diagonally pointing down above your forehead and should be just out of the camera’s frame but close enough to pick up your voice.
Use the arrow-pointing knobs to adjust the microphone if needed. You can turn the knobs counter-clockwise to loosen and clockwise to tighten. Seek assistance if required.
Step 6 (OPTIONAL)
Adjust the camera’s height.
The camera is attached to the teleprompter and tripod but can be adjusted. Turn knob underneath the “red dot” and lift up or drop down to adjust the camera’s height. (BE CAREFUL, the teleprompter has some weight.) When height is optimal, tighten the knob.
STEP 7
Adjust the ATEM Mini dashboard.
The ATEM Mini dashboard is on the left-hand side (the one with MANY buttons). It provides many options for your recording. If you are anxious with pressing buttons, please don’t hesitate to get assistance from one of the staff from The Commons. All the buttons are labelled. Learn about which buttons to press in the video.
Step 8
Start & stop recording.
You are now ready to start recording. Follow the instructions on the recorder (the box below the monitor) to start recording.
- Insert your USB Flash Drive
- Wait for light next to USB to turn solid green.
- Press the “REC button” to begin recording. The REC button should turn to a solid red light.
- When finished recording, press “Stop button” to stop.
- Wait for light next to USB turn solid green, remove your USB flash drive.
STEP 9
Power off the room &
Next Steps.
Go to post-recording if you wish to review your recordings in the studio. Once you are finished with using the studio, remember to…
- Log out of the room computer
- Wipe off everything you’ve touched for the next person
- Turn off the lights using the remote
- Don’t leave anything behind (unless you want to be back)
- Press “off” on the door frame’s switch